


Everything you need to know about limewash paint
My first experience with limewash

But what the heckin' is limewash?
Originating from the Roman era, limewash paint is made from crushed limestone that’s fired at very high temps, and then mixed with water. The result is a beautifully textured, chalky-looking paint that resembles a “romantic old-world feel”. It’s also known to be eco-friendly and hypoallergenic, and contains a high PH which makes it bacteria and mold-resistant (*shrugs* - but I’ll take it).
What are the downsides?
It’s not cheap - but also, most paint isn’t.
It’s a learning curve. You cannot use a paint roller. Instead, you must hand paint with a special Chinex brush (that is also not cheap 🫠).
It’s a bit watery, so you have to be careful when painting. Otherwise, it can splatter onto other parts of the wall or surrounding areas.
It’s not for everyone. While limewash looks dreamy in photos, it looks different IRL. The textured look - which comes from apparent brush strokes - can seem messy and too DIY for some people.
It likely won’t turn out the way you envisioned, especially if the wall conditions aren’t right or you didn’t prep properly. Take notes from this blogger :(
How much does it cost?
I paid $250.25 to paint one wall in our guest room.
It also depends on the brand you go with. I went with Portola Paints and ate the cost of shipping twice because I bought samples first. Note that the above cost is all inclusive (supplies, shipping, tax). It does not include the other 5 million samples I got.
Yassi’s Take™️
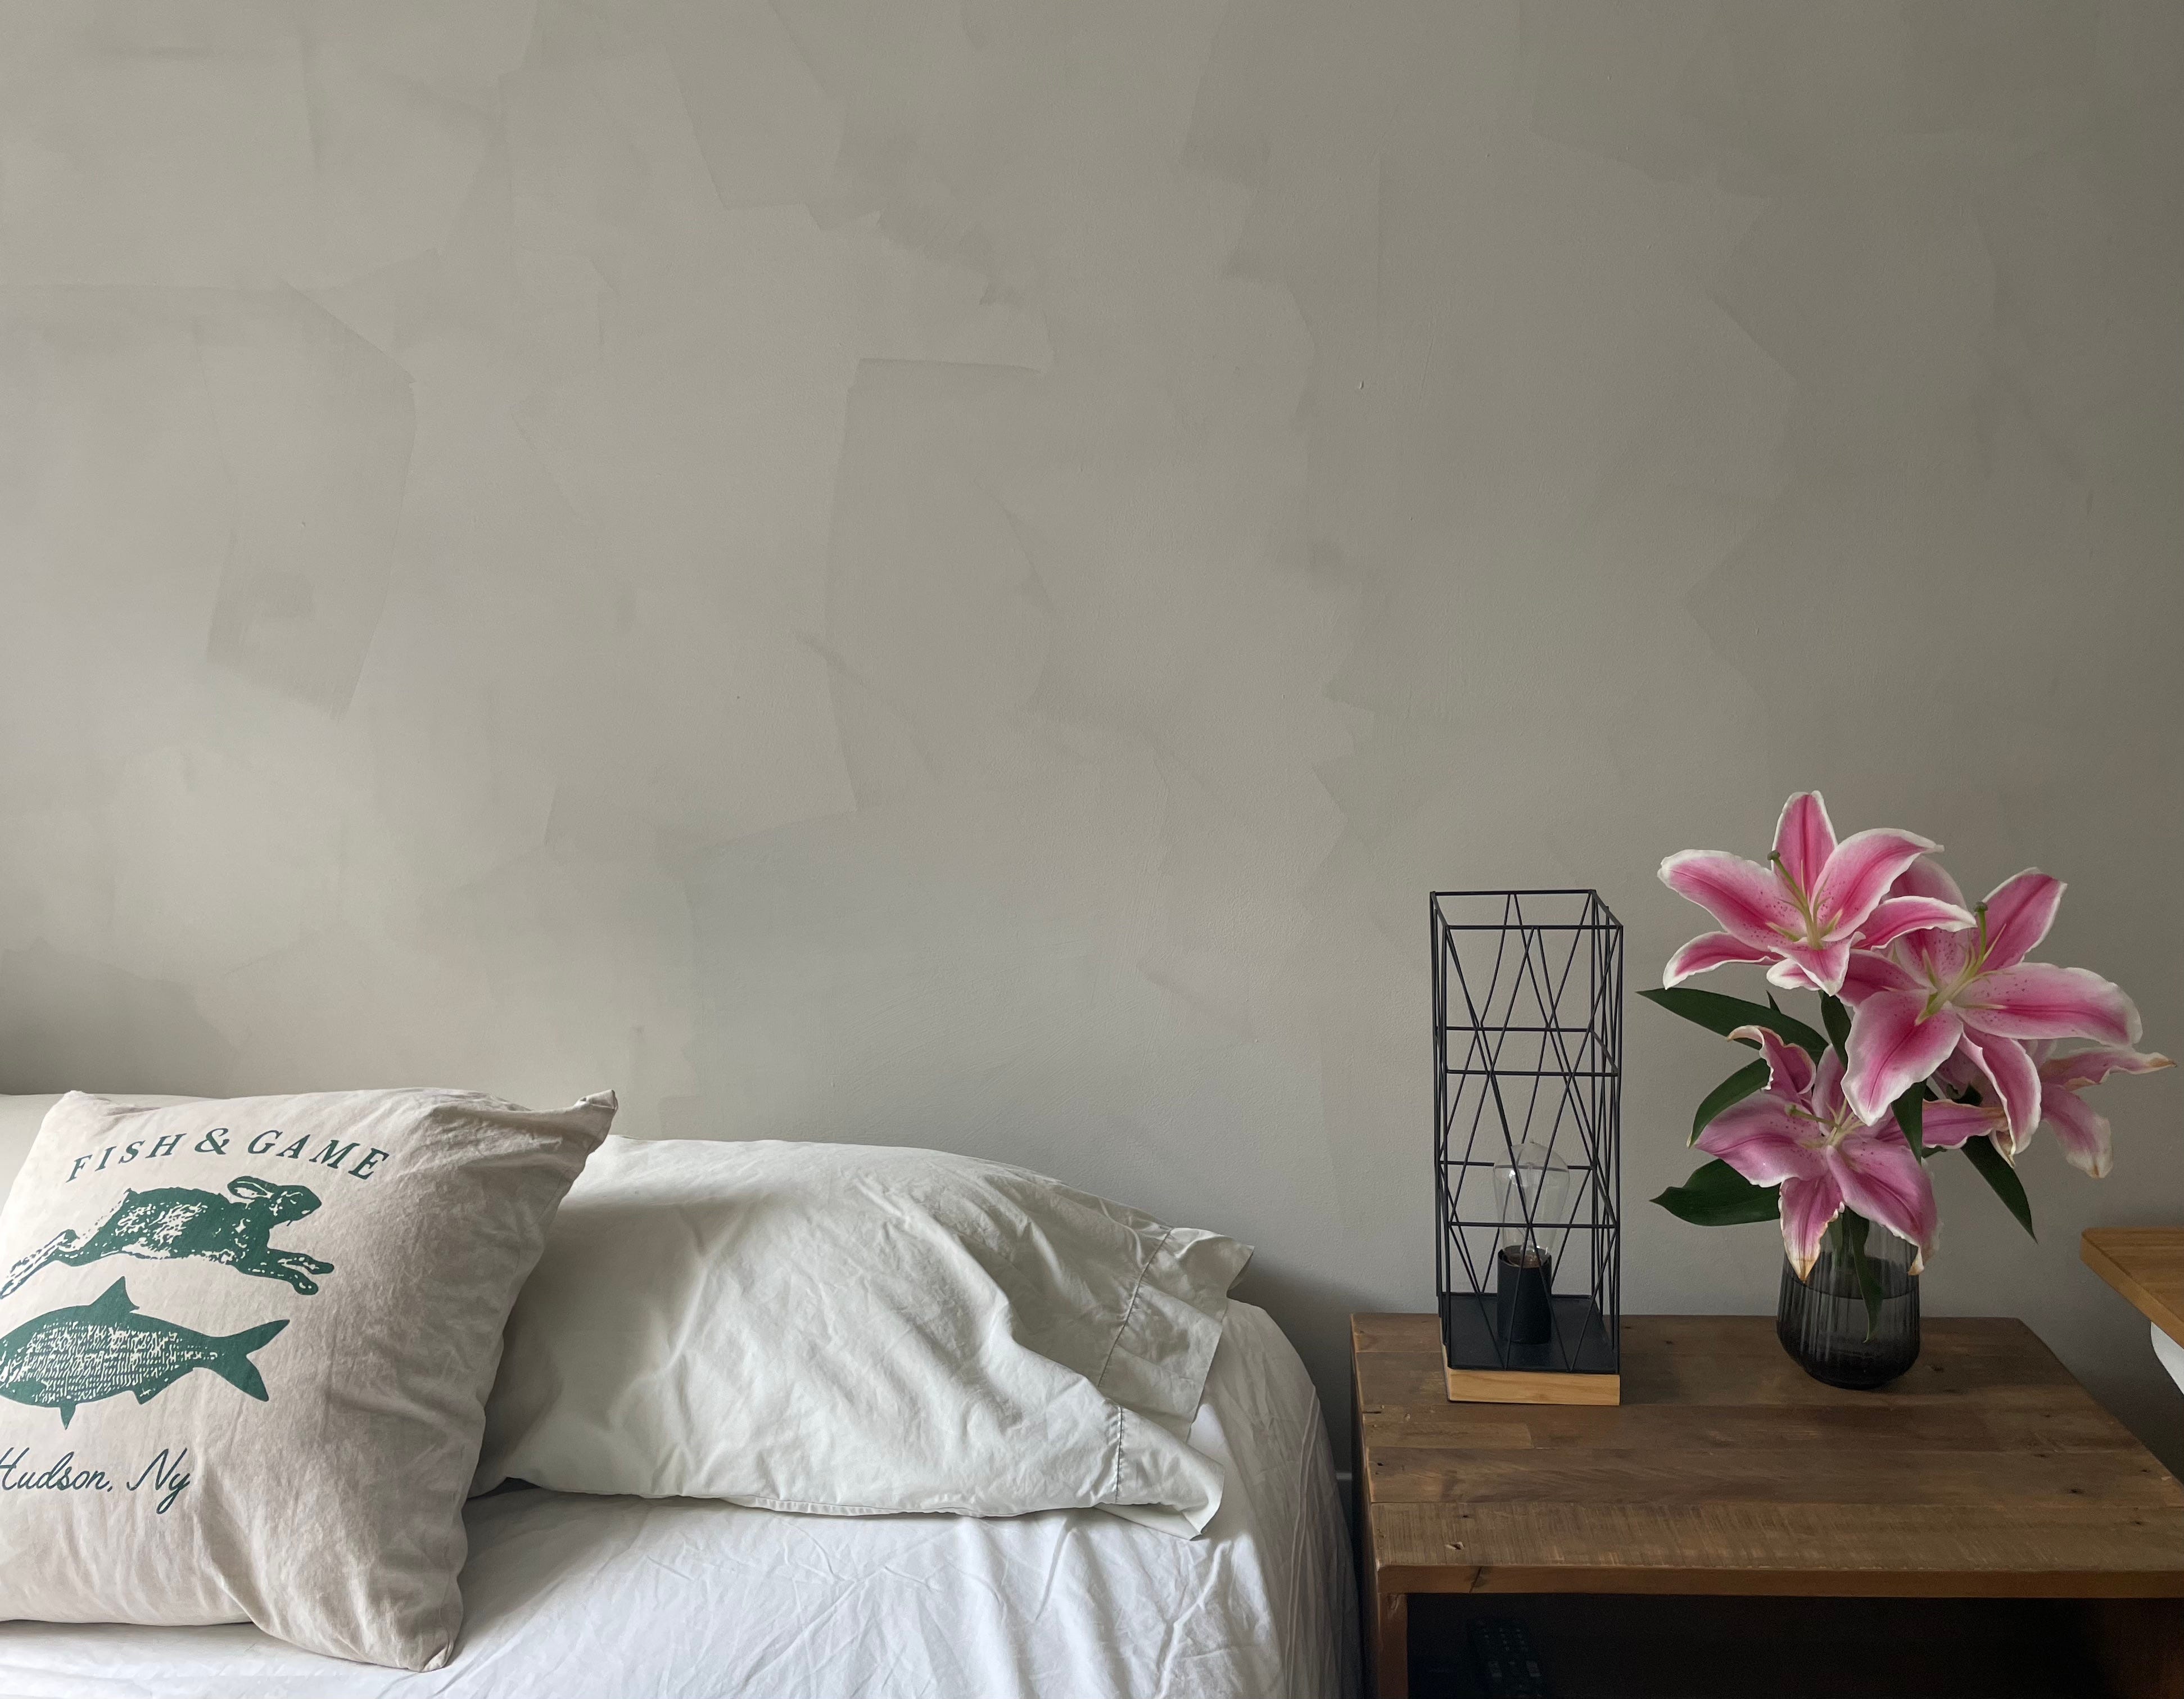
I absolutely adore the look of limewash on our wall. It immediately added dimension to our minimal guest room, and gives off a rustic European vibe. I am so happy with it. Also, me and Andrew are not handy in any way, shape, or form, and this was our first DIY home reno project - BUT it somehow worked out because I did a lot of research and was very careful about prep.
I do think it’s risky, but you can do it. And you don’t need to hire someone. If you can pick a wall to test on, appreciate a challenge, and are patient, the results will 100% pay off.
If you want the full deets, read on or skip through:
What do you need to get started?
What do you need to get started?
Acrylic primer (we opted for this brand instead of Portola’s because it was cheaper and it turned out totally fine)
Paint roller (for the primer)
Limewash paint (we bought ours from Portola Paints)
If you are doing an accent wall, 1 gallon should be more than enough. If you are doing an entire room, I would opt for 5 gallons.
Do not skip out on samples!
I bought eight samples, lol. Like a true New Yorker, I needed OPTIONS. And yes, they all tell you that paint is reversible etc etc, but I simply👏🏼do👏🏼not👏🏼have👏🏼the👏🏼time👏🏼👏🏼👏🏼. Each sample was $10, which I thought was worth a seemingly permanent decision. Here are the five I started with:
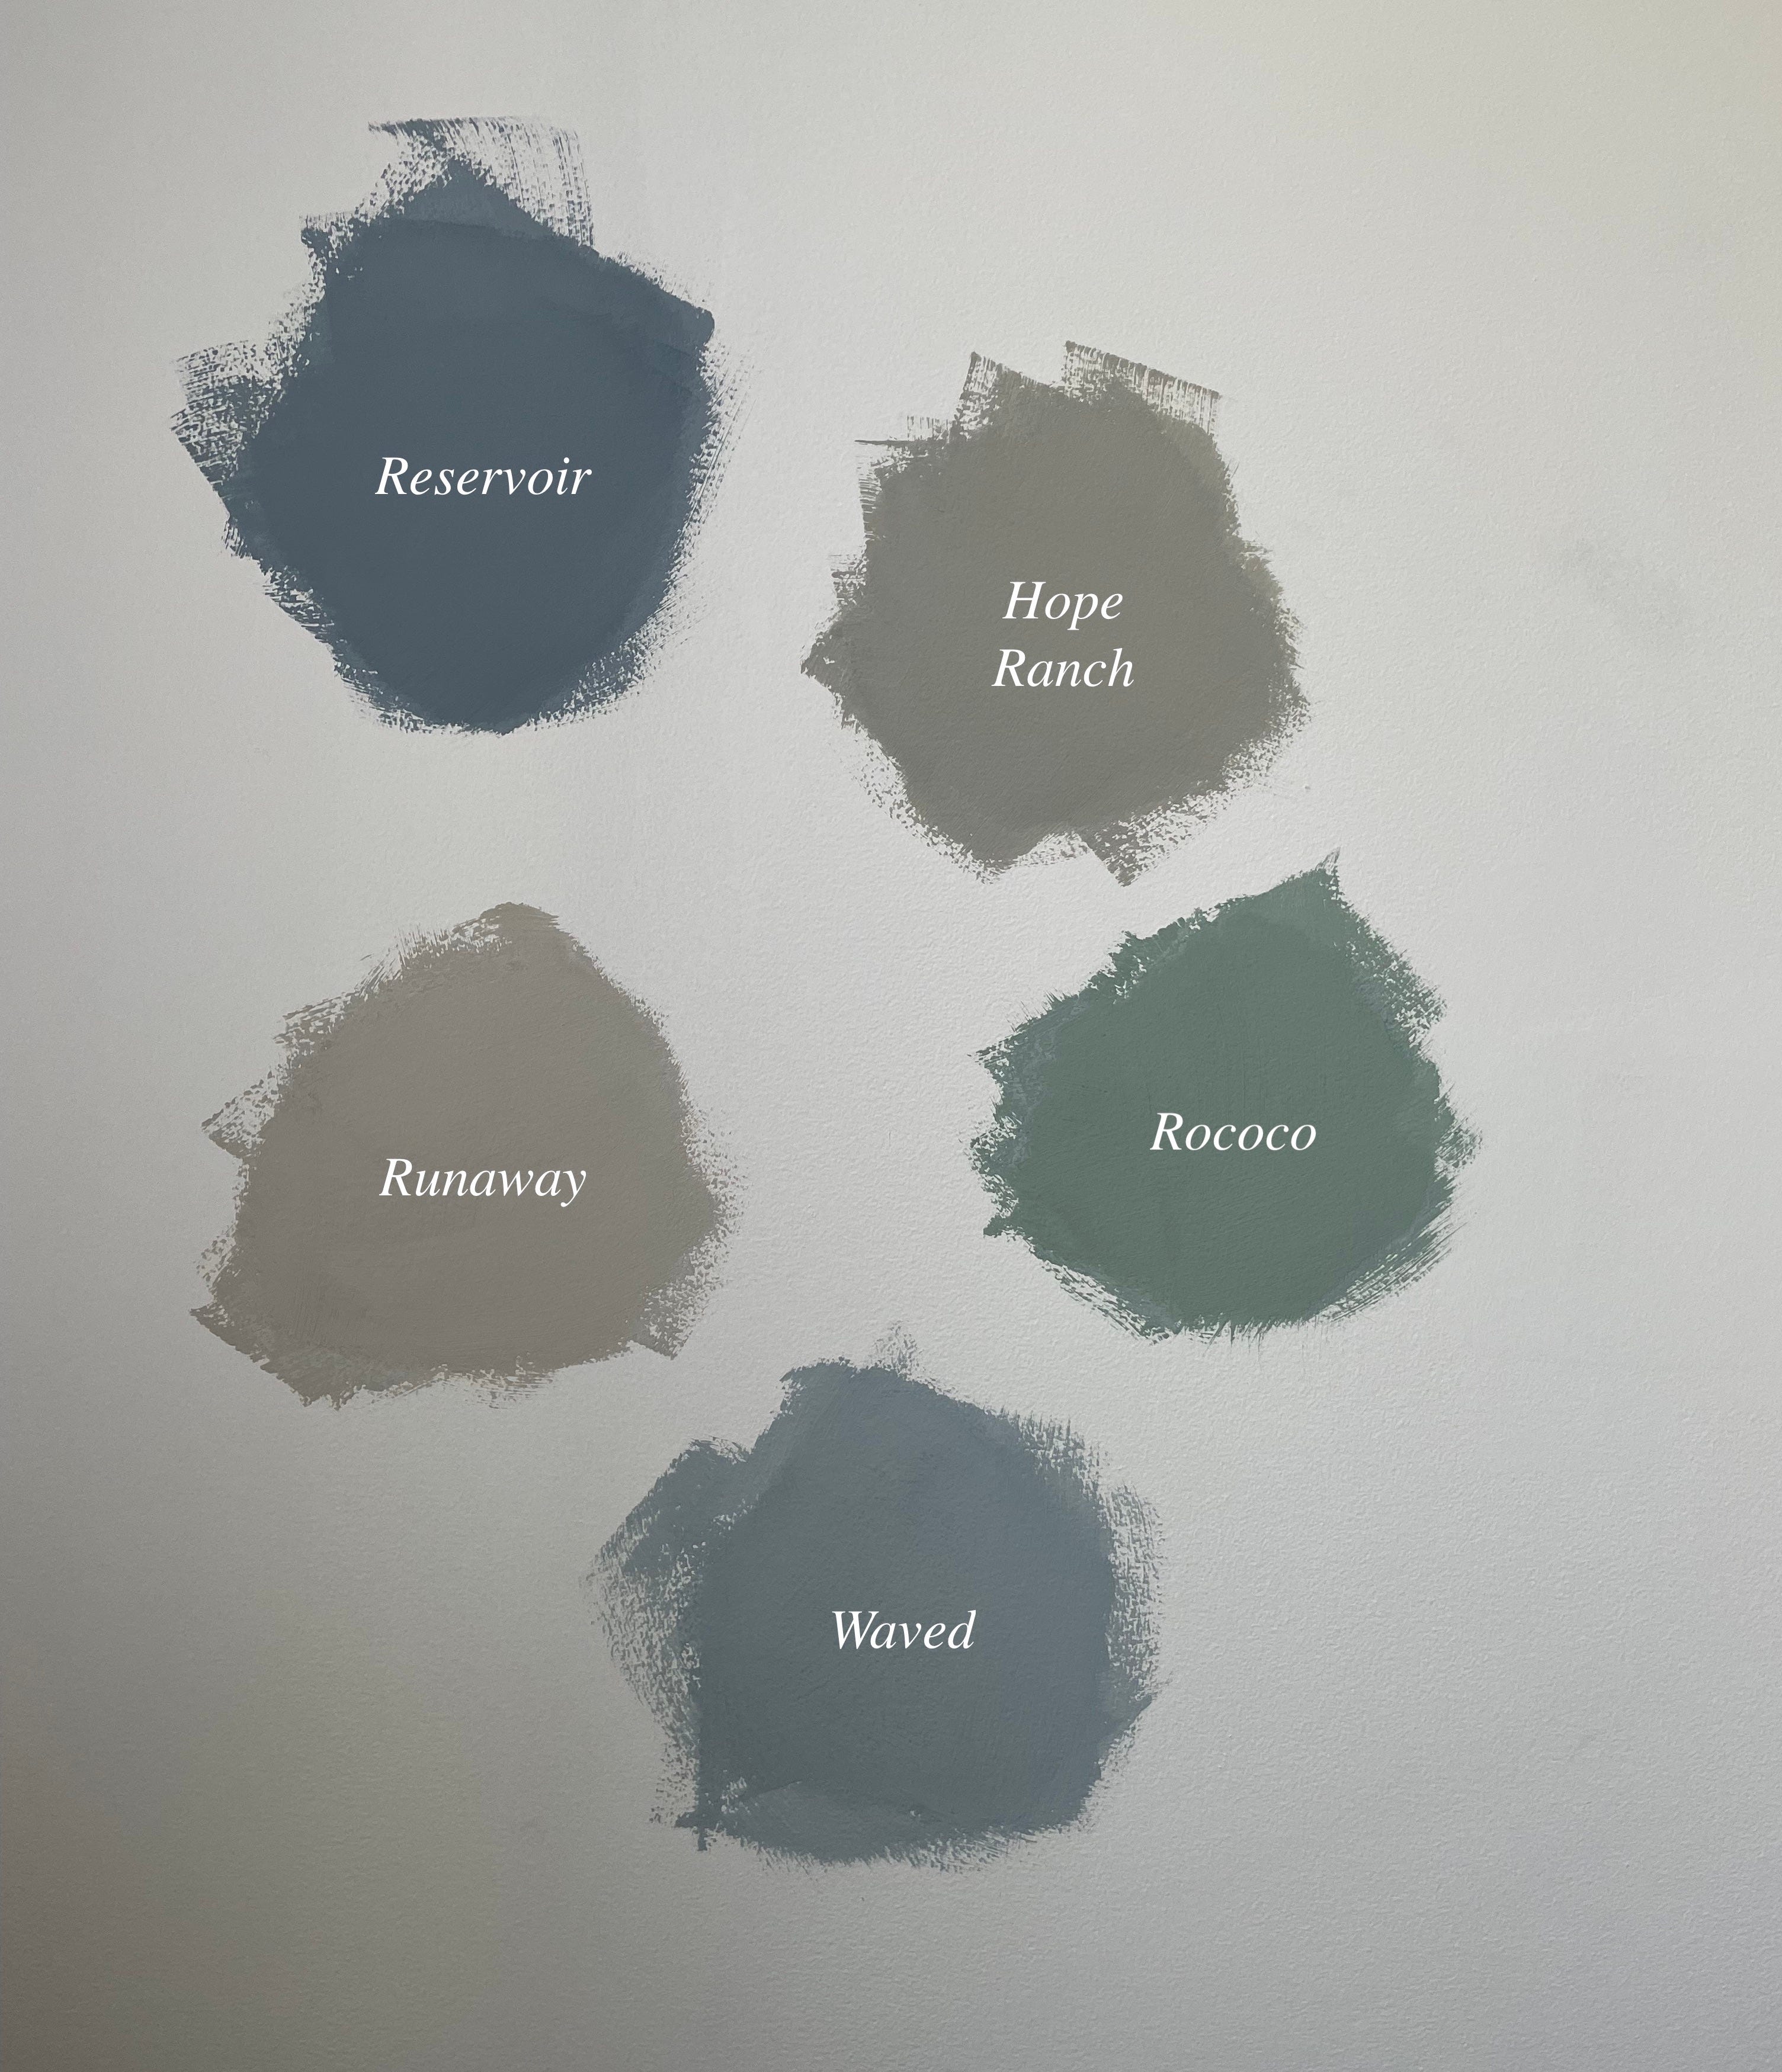
Based on Portola’s website, I thought Hope Ranch was the one. But the truth is, what you see in pictures is not reality. All of the colors appeared a lot darker on my wall, even though our guest room has the most bright indirect light. Based on my gut (and the results of my Instagram poll), I chose Runaway.
Hot tipz 🔥
DO make sure your wall is smooth and even. Sand off any rough edges, including your paint samples.
DO choose a darker color, as you don’t get as much of the texture effect with lighter colors. I’d stay away from the white / beiges if you want to see the limewash come through.
DO use a 100% acrylic primer. This protects the wall and allows it to absorb the paint correctly. Portola recommends using their version, but I just couldn’t stomach the price + the extra $30 shipping fee. The one we bought at Home Depot worked out just fine.
DO make sure you have enough paint for your second coat. Portola suggests having at least half of the amount you used on your first coat before applying the second coat, as you will end up using more paint for that round.
DO watch a few tutorials before getting started. Here are the two videos I repeatedly watched.
DO make sure you set aside a few hours to apply each coat. Limewash dries quickly, so it’s ill-advised for you to stop halfway and then come back to it later. It will look bad. Don’t do it.
DO wait at least 24 hours before applying the second limewash coat.
DO NOT be shy with that painters’ tape to protect surrounding walls, ceilings, electric outlets, etc. Like I said, limewash has a tendency to splatter if you’re not careful. You’ll also want to make sure any drips get wiped up pretty quickly so they don’t dry up on the wall.
The journey
The process of actually painting took us four days. Not mentioned, the four weeks it took us to decide on the paint color, lol. Here’s what the run of show looked like:
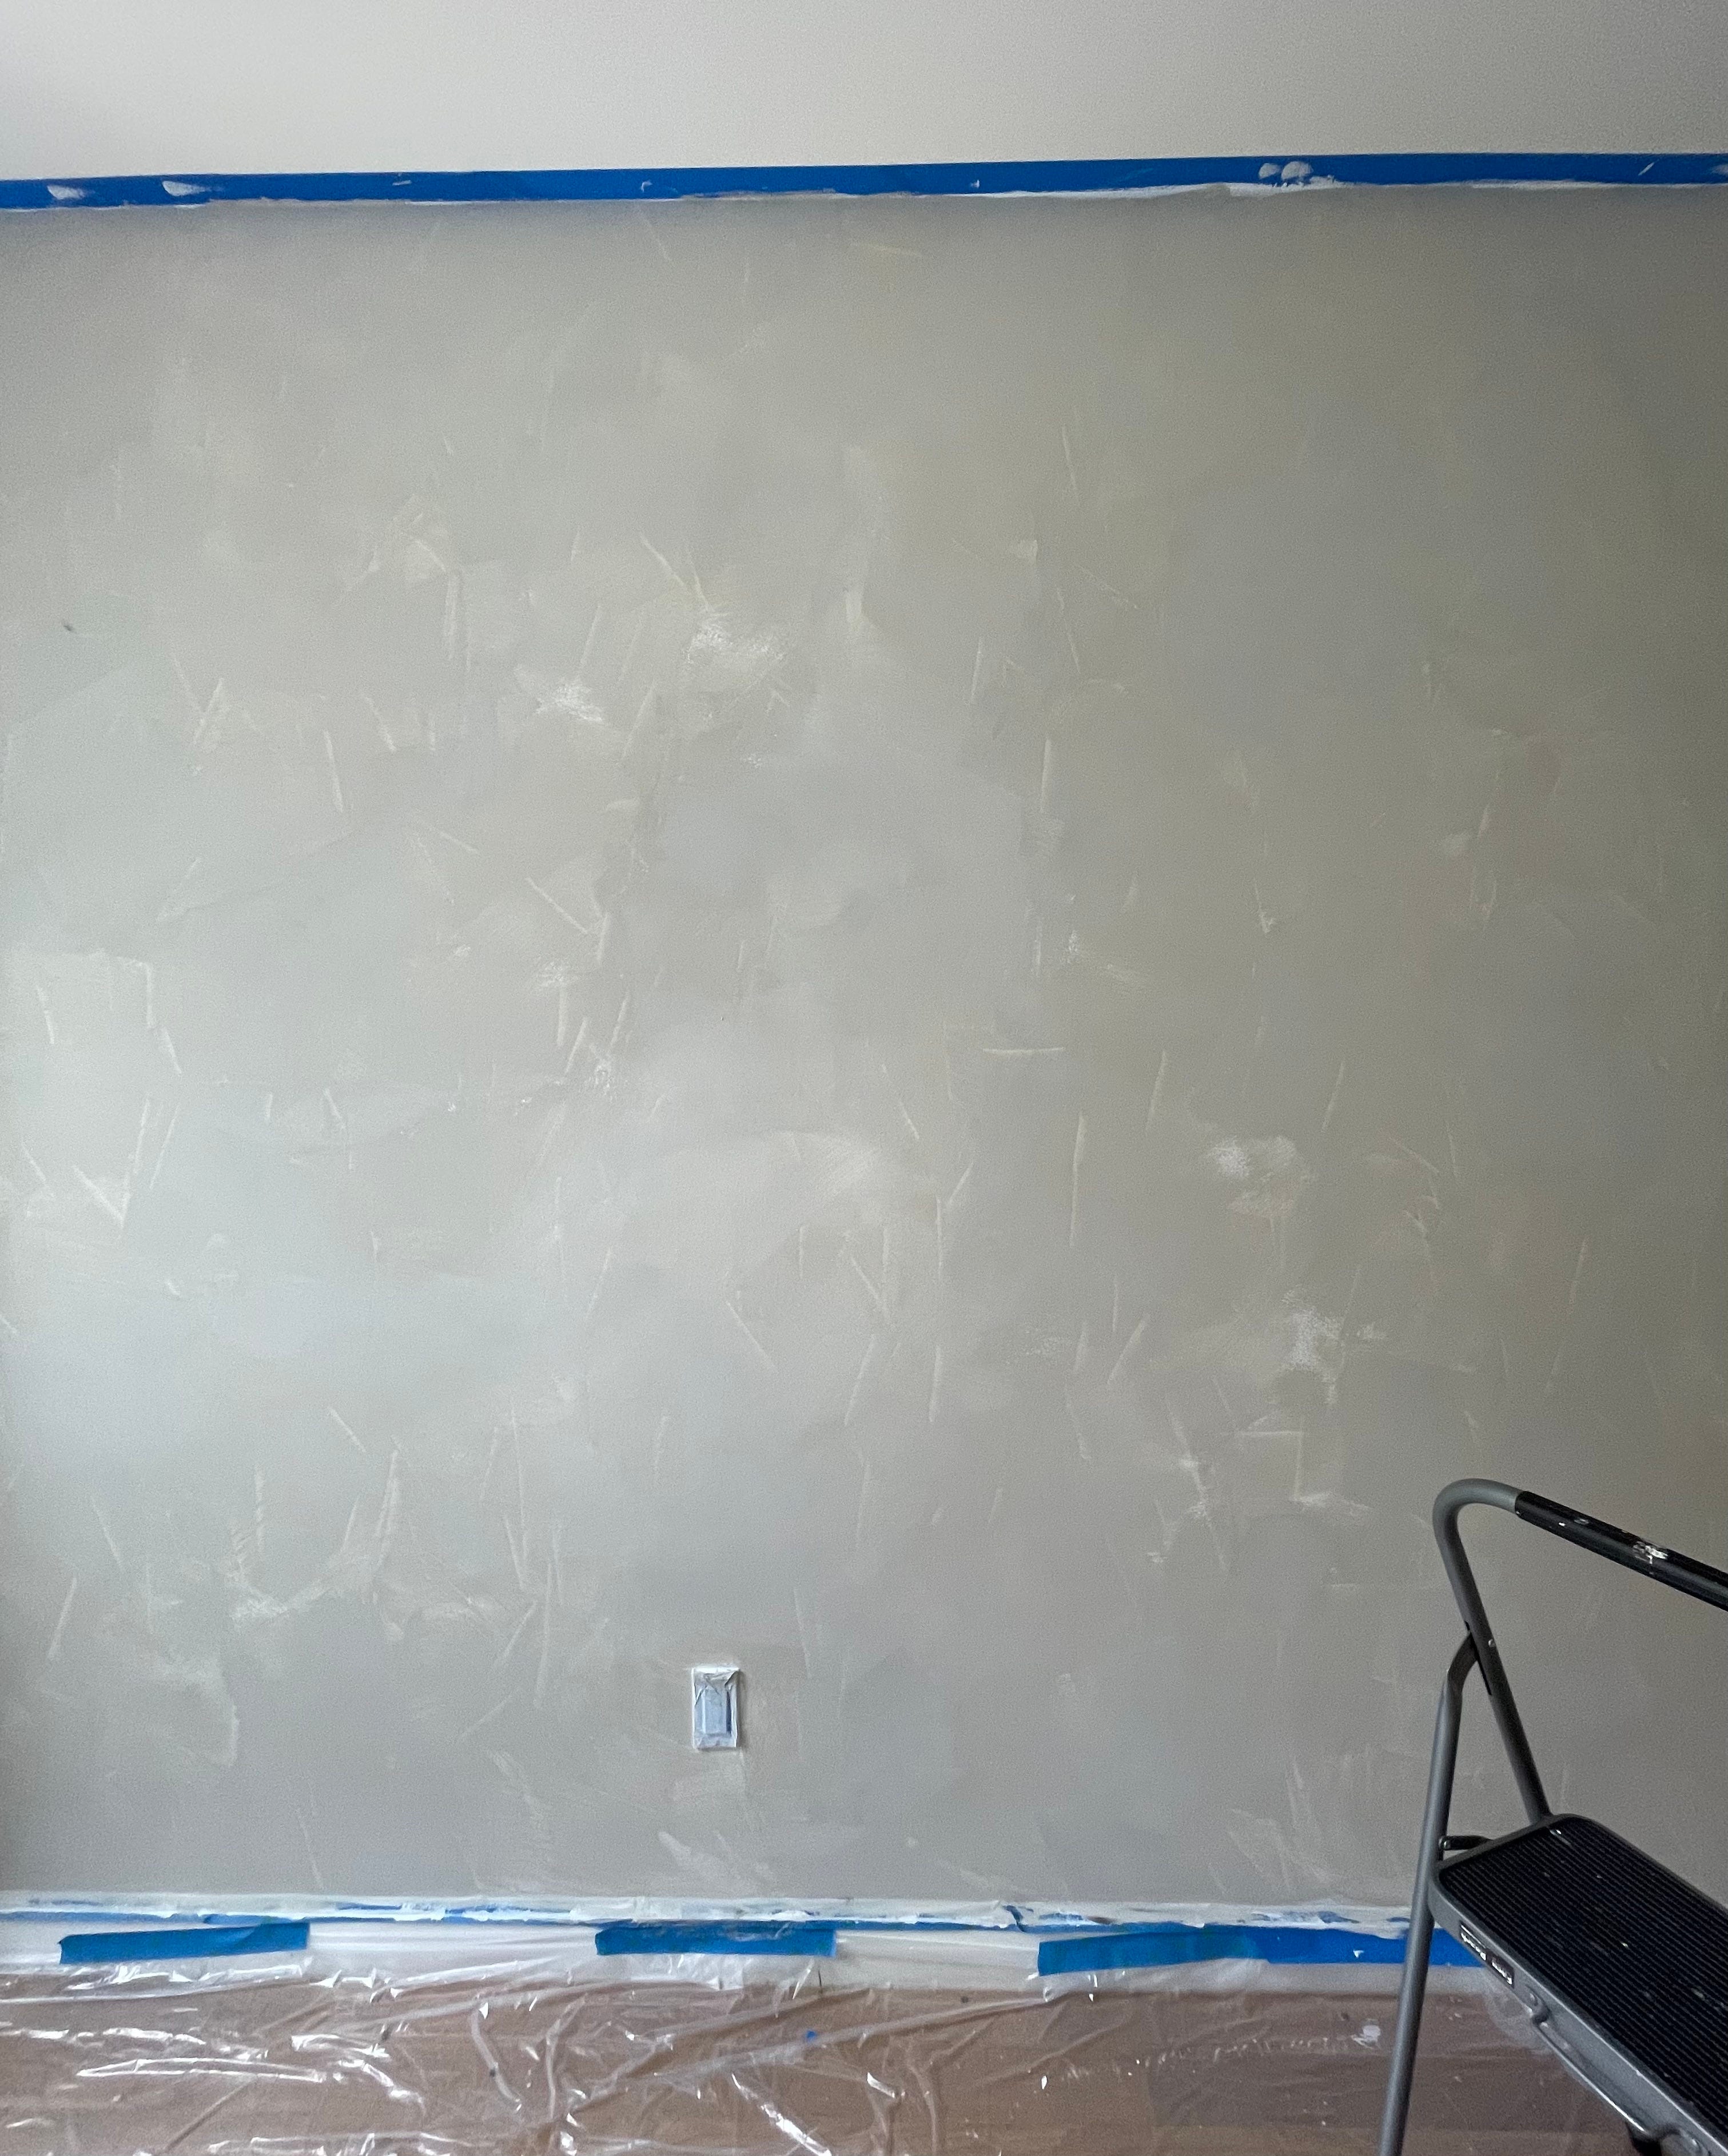
Day 1: Roll on the first coat of primer, then let dry for 24 hours.
Day 2: Repeat with the second coat of primer.
Day 3: Hand paint the first coat of limewash, then let dry for 24 hours.
Day 4: Repeat with the second coat of limewash.
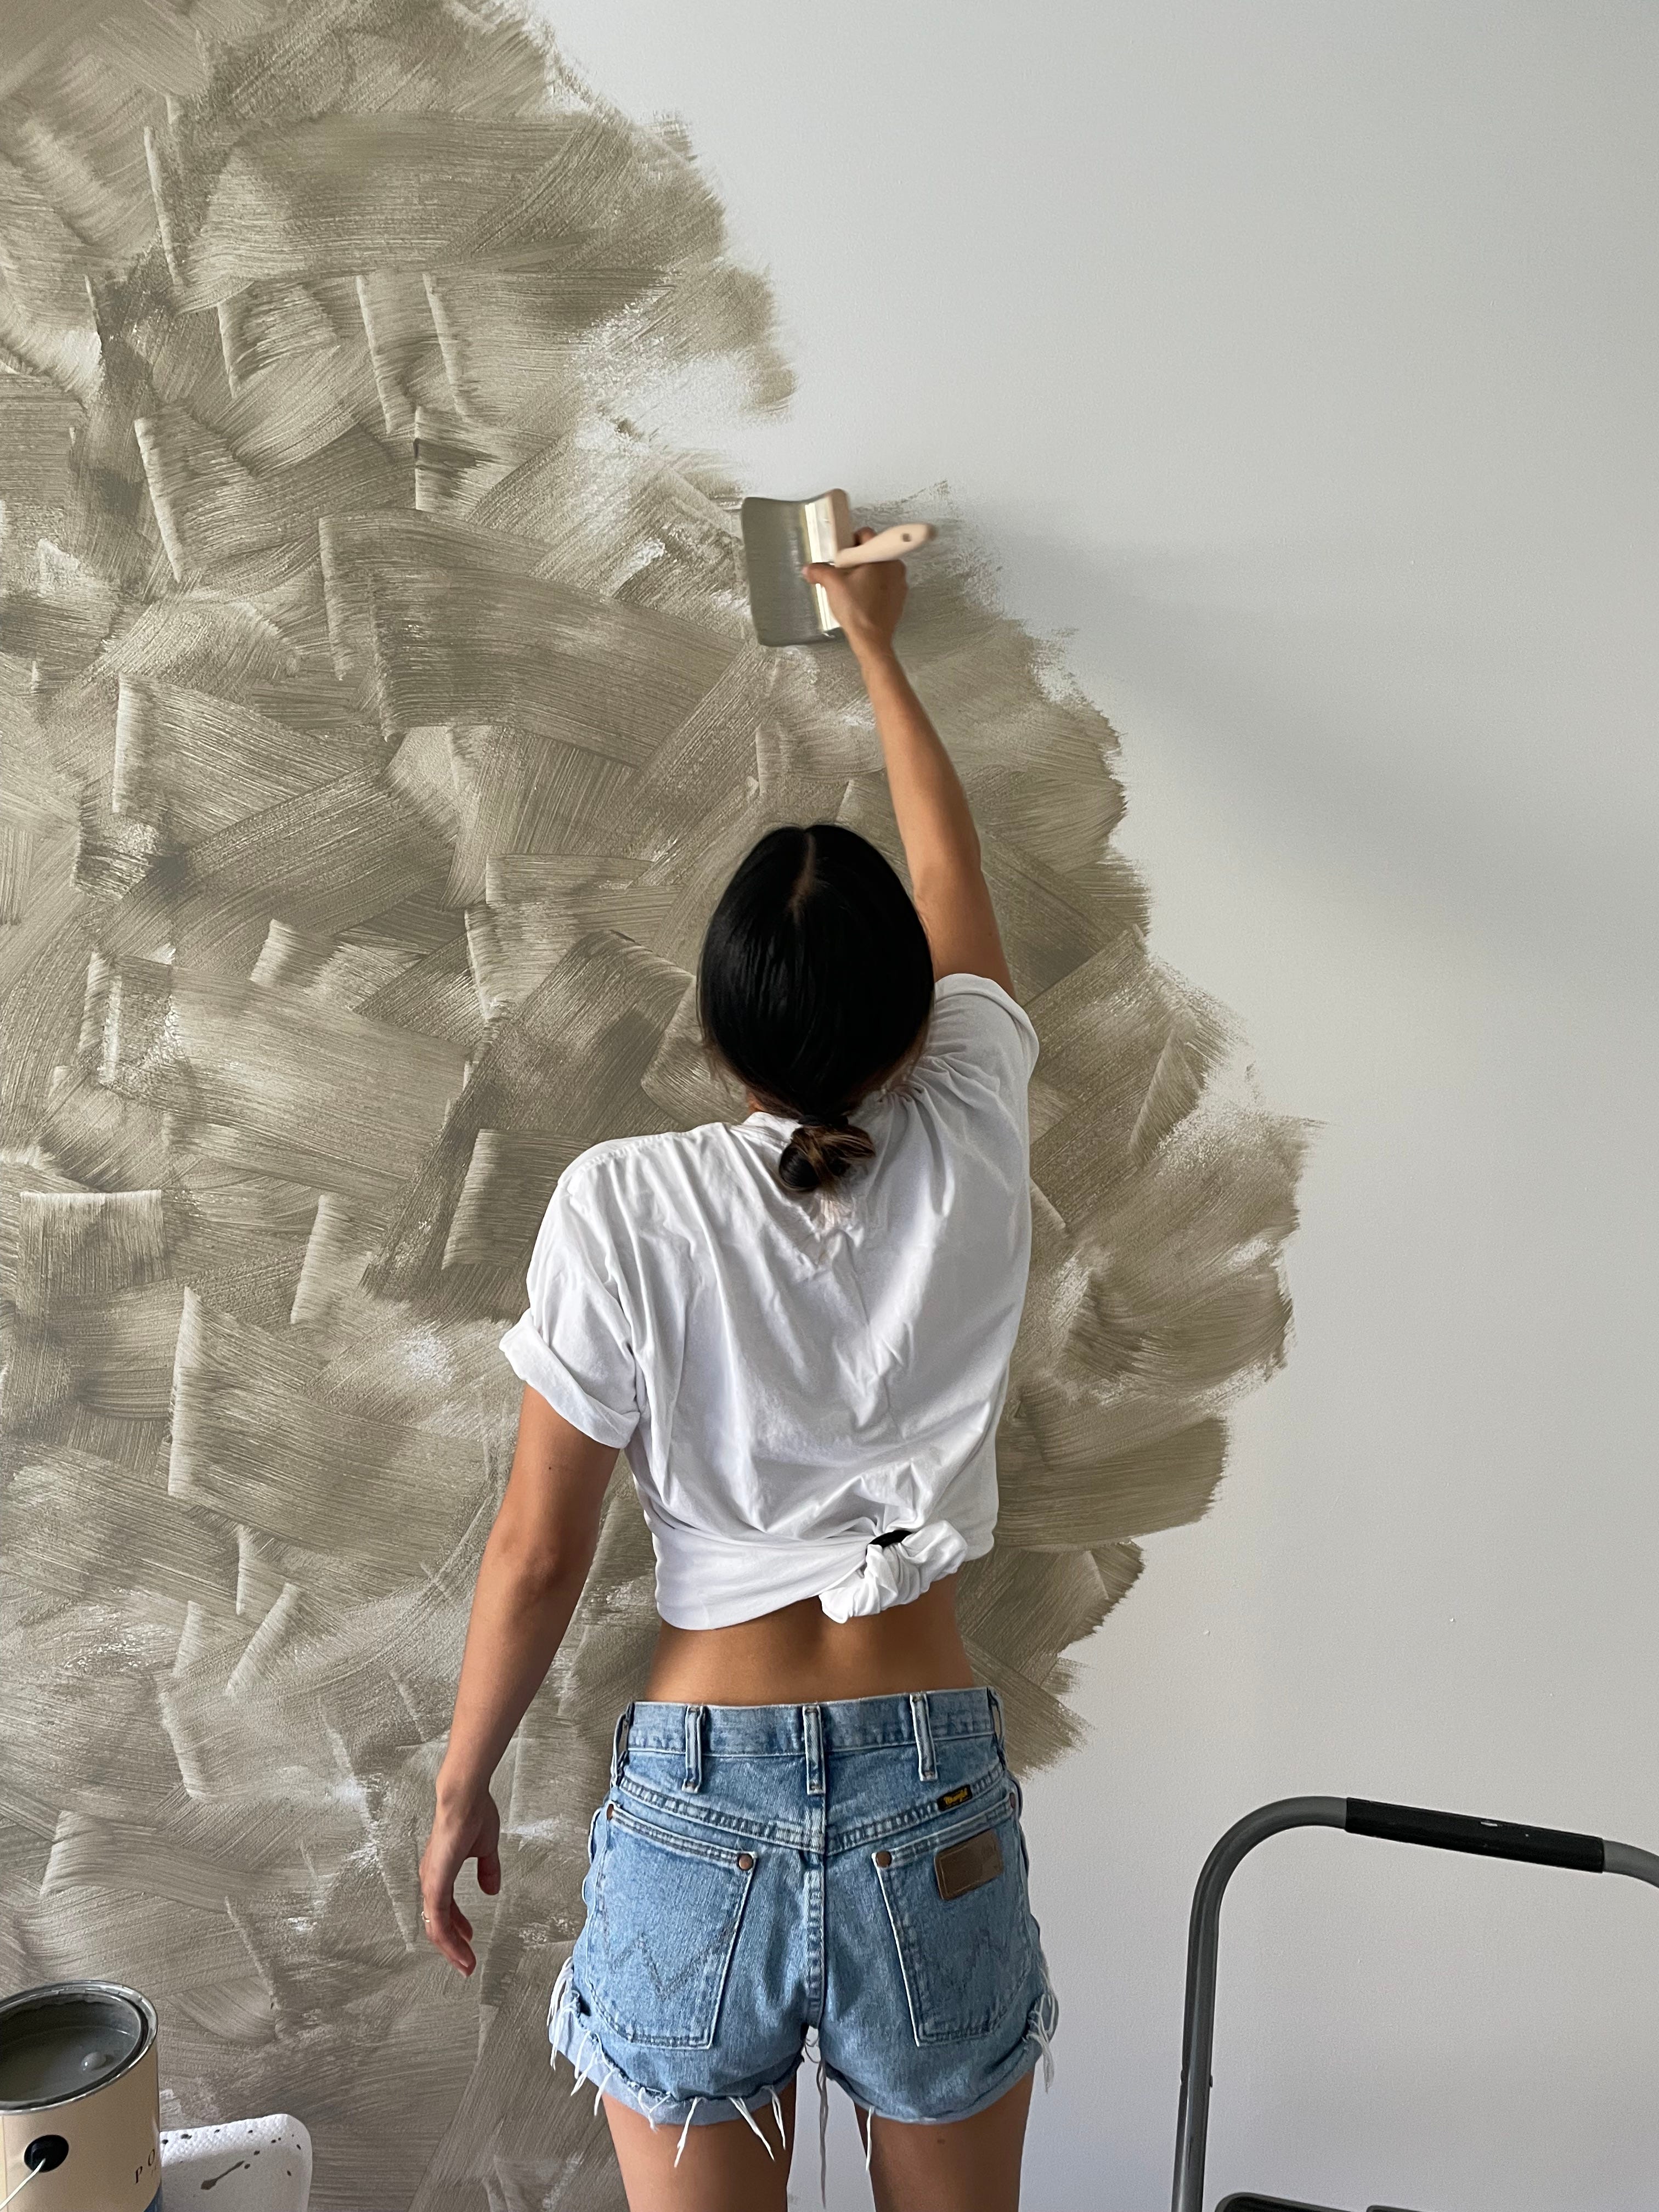
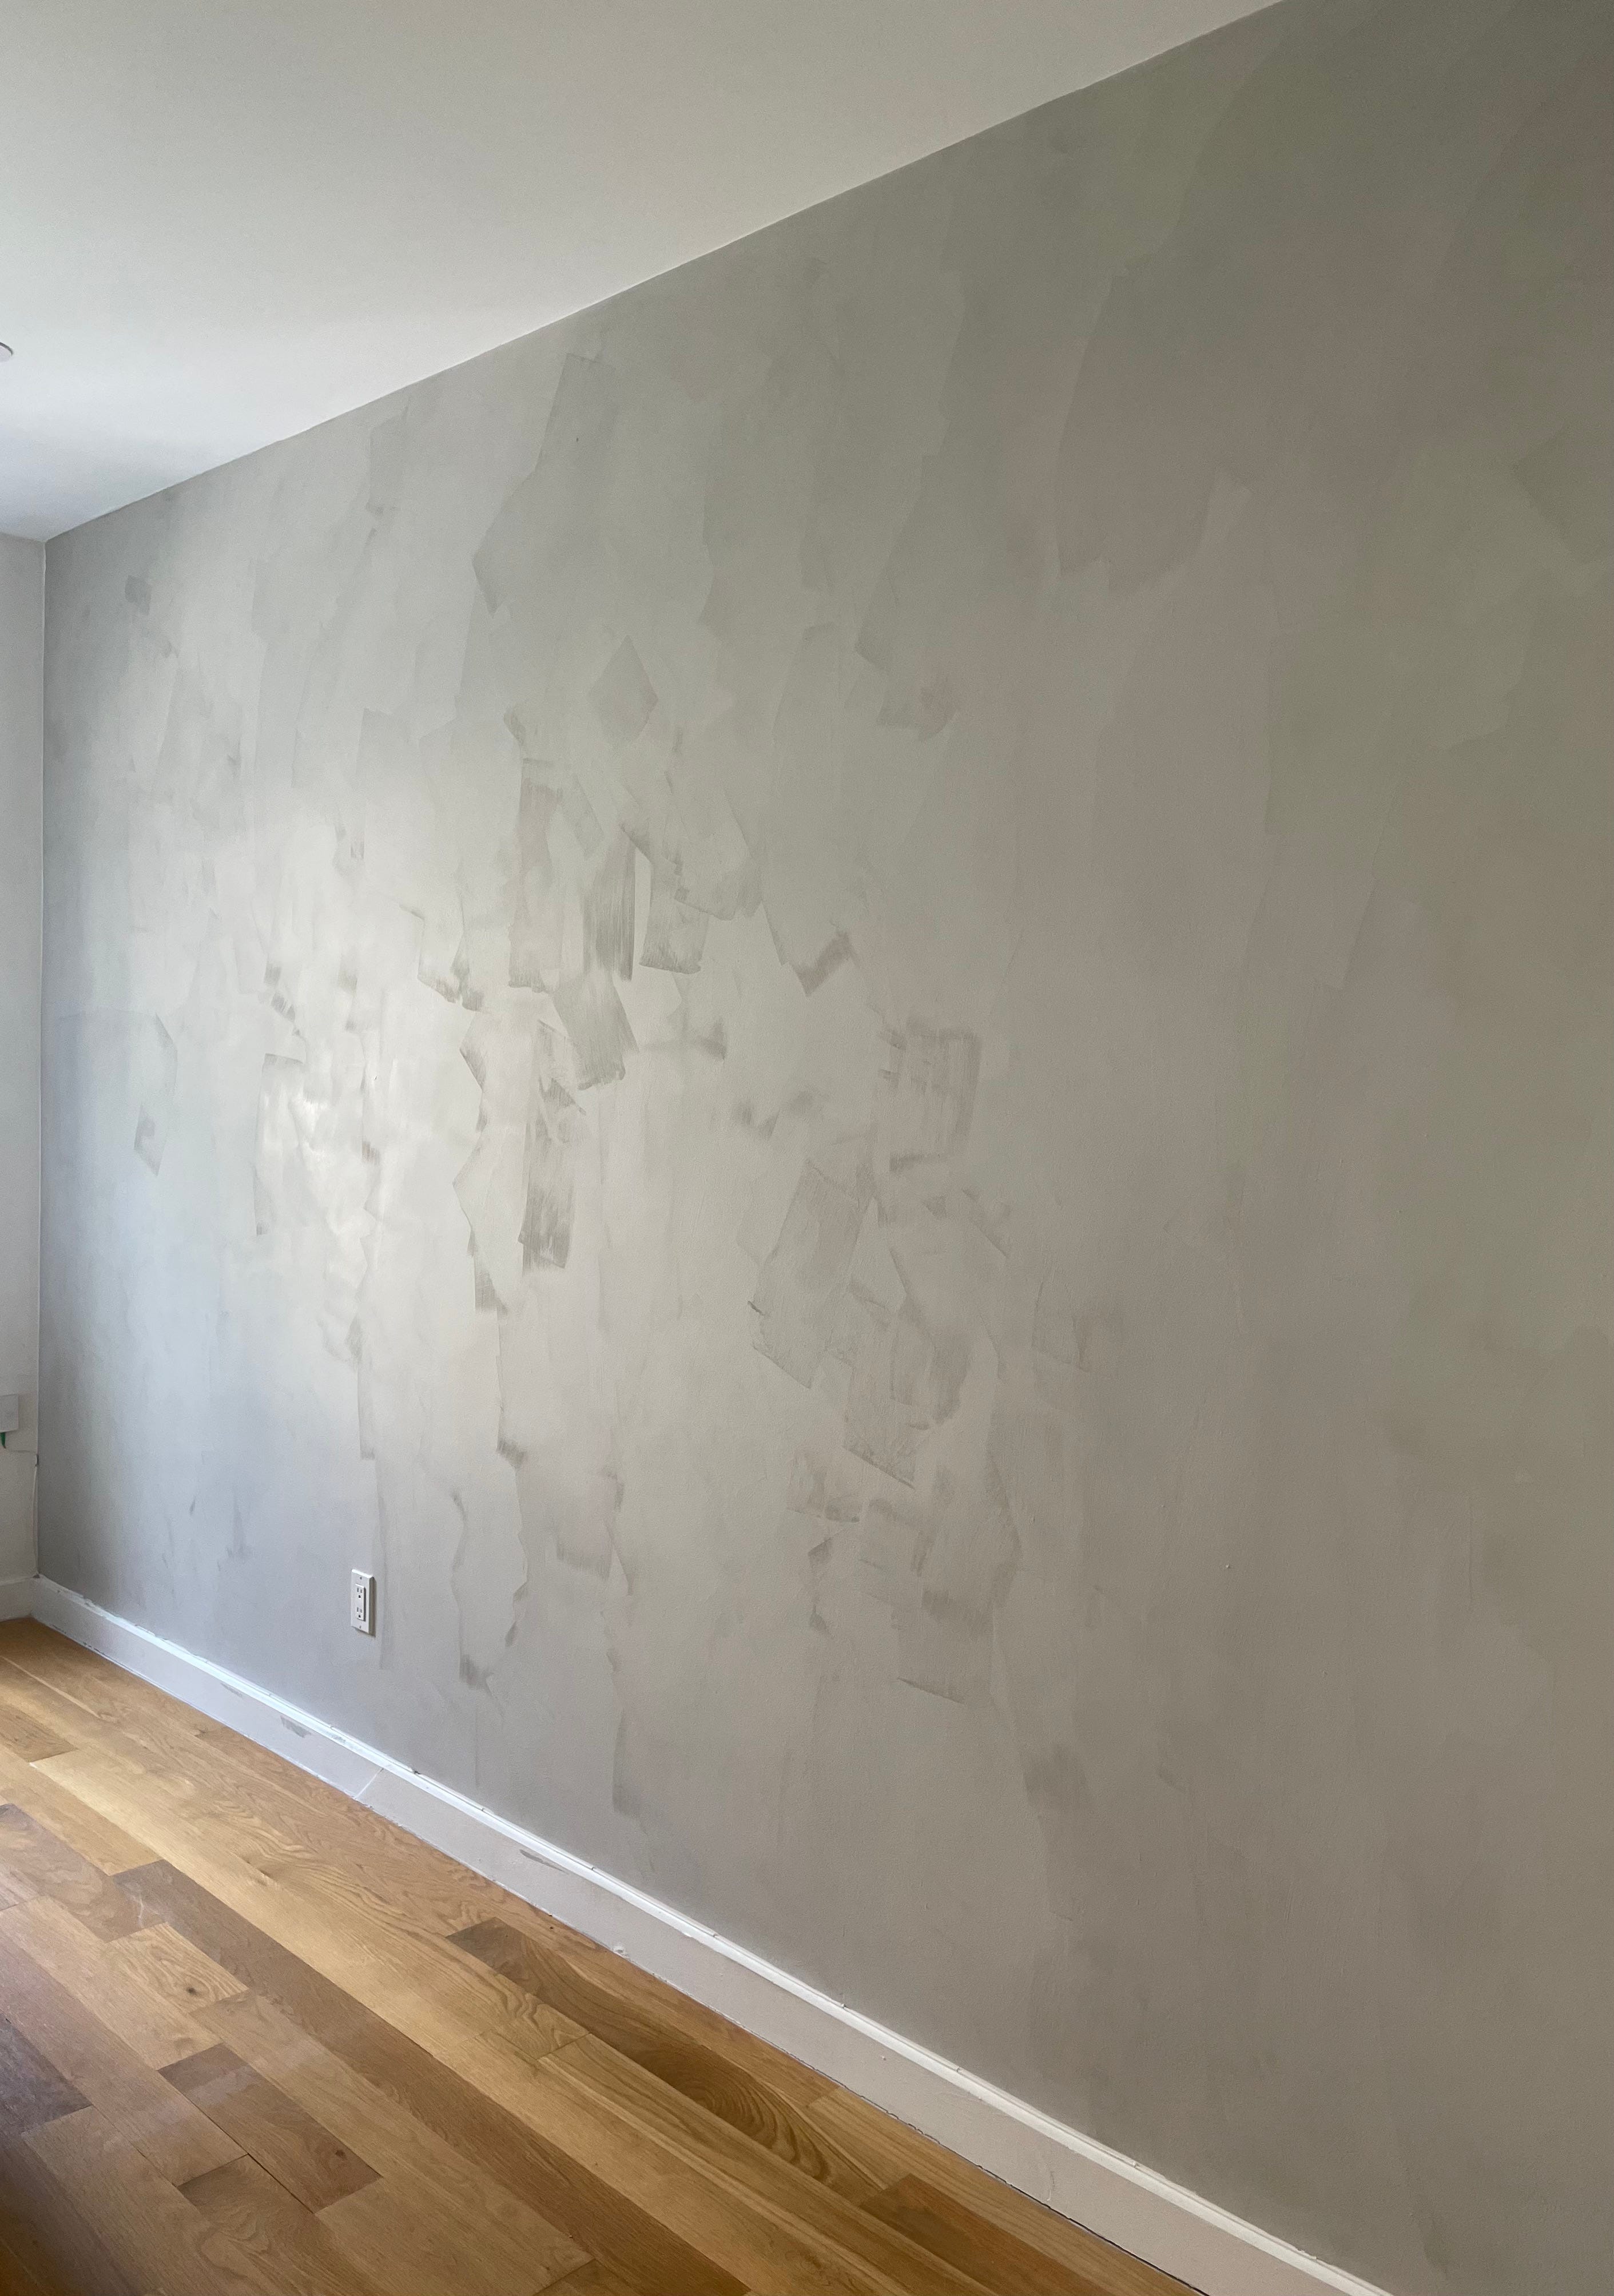
Surprisingly, hand painting was fun and meditative. They say you should paint with a cross-hatch pattern, which you should not overthink because limewash lends itself to random brush strokes. Just swish-swish the brush around and you’ll get into a rhythm:
Per Portola’s tutorial, we started painting from the top left corner and worked our way outwards and to the right. Think of a cloud blooming out. You want that shape so you can keep a “wet edge” so that the paint doesn’t fully dry, and therefore ensures smooth and consistent brush strokes.
As mentioned, this paint dries quickly, which means you will need to work quickly. Be mindful of any paint drips / splatters, especially during the second coat, or you may end up with a few of these:
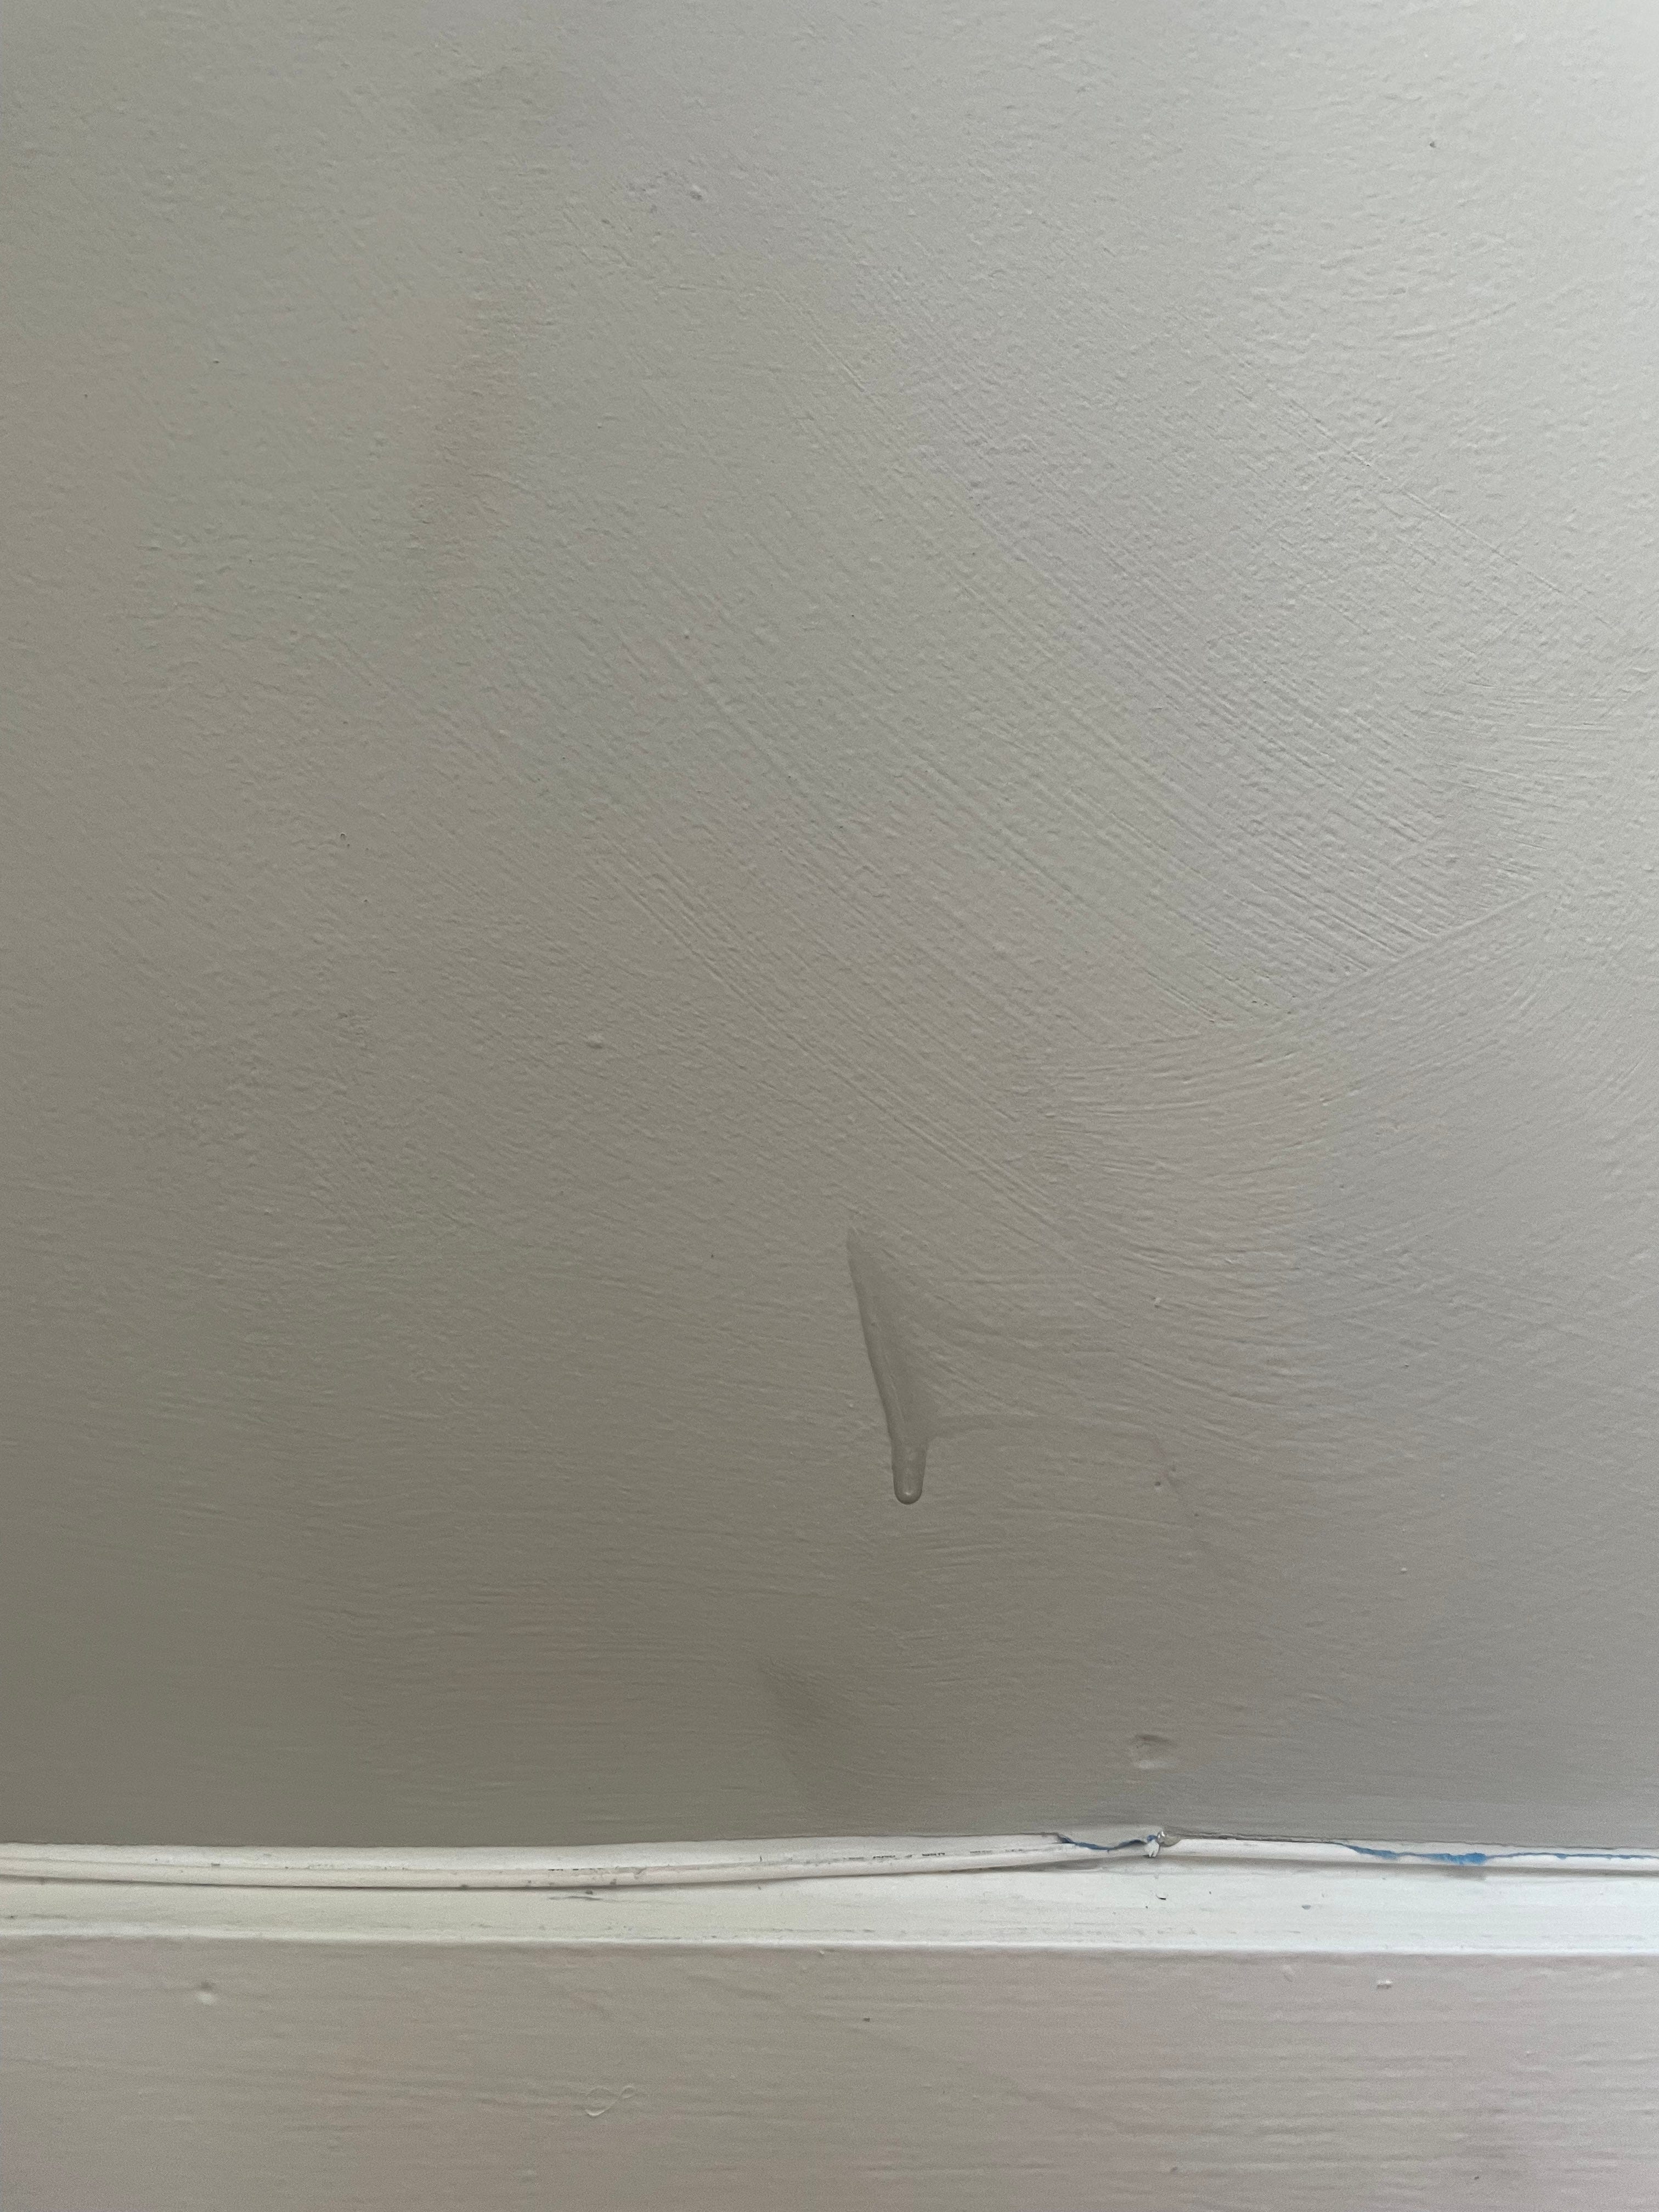
Yes, I am aware this looks…unwell lol. At least Andrew and I thought so. After a few hours of sitting with disappointment, slight panic, and the idea that we just wasted our time and money, we started to move furniture back in:
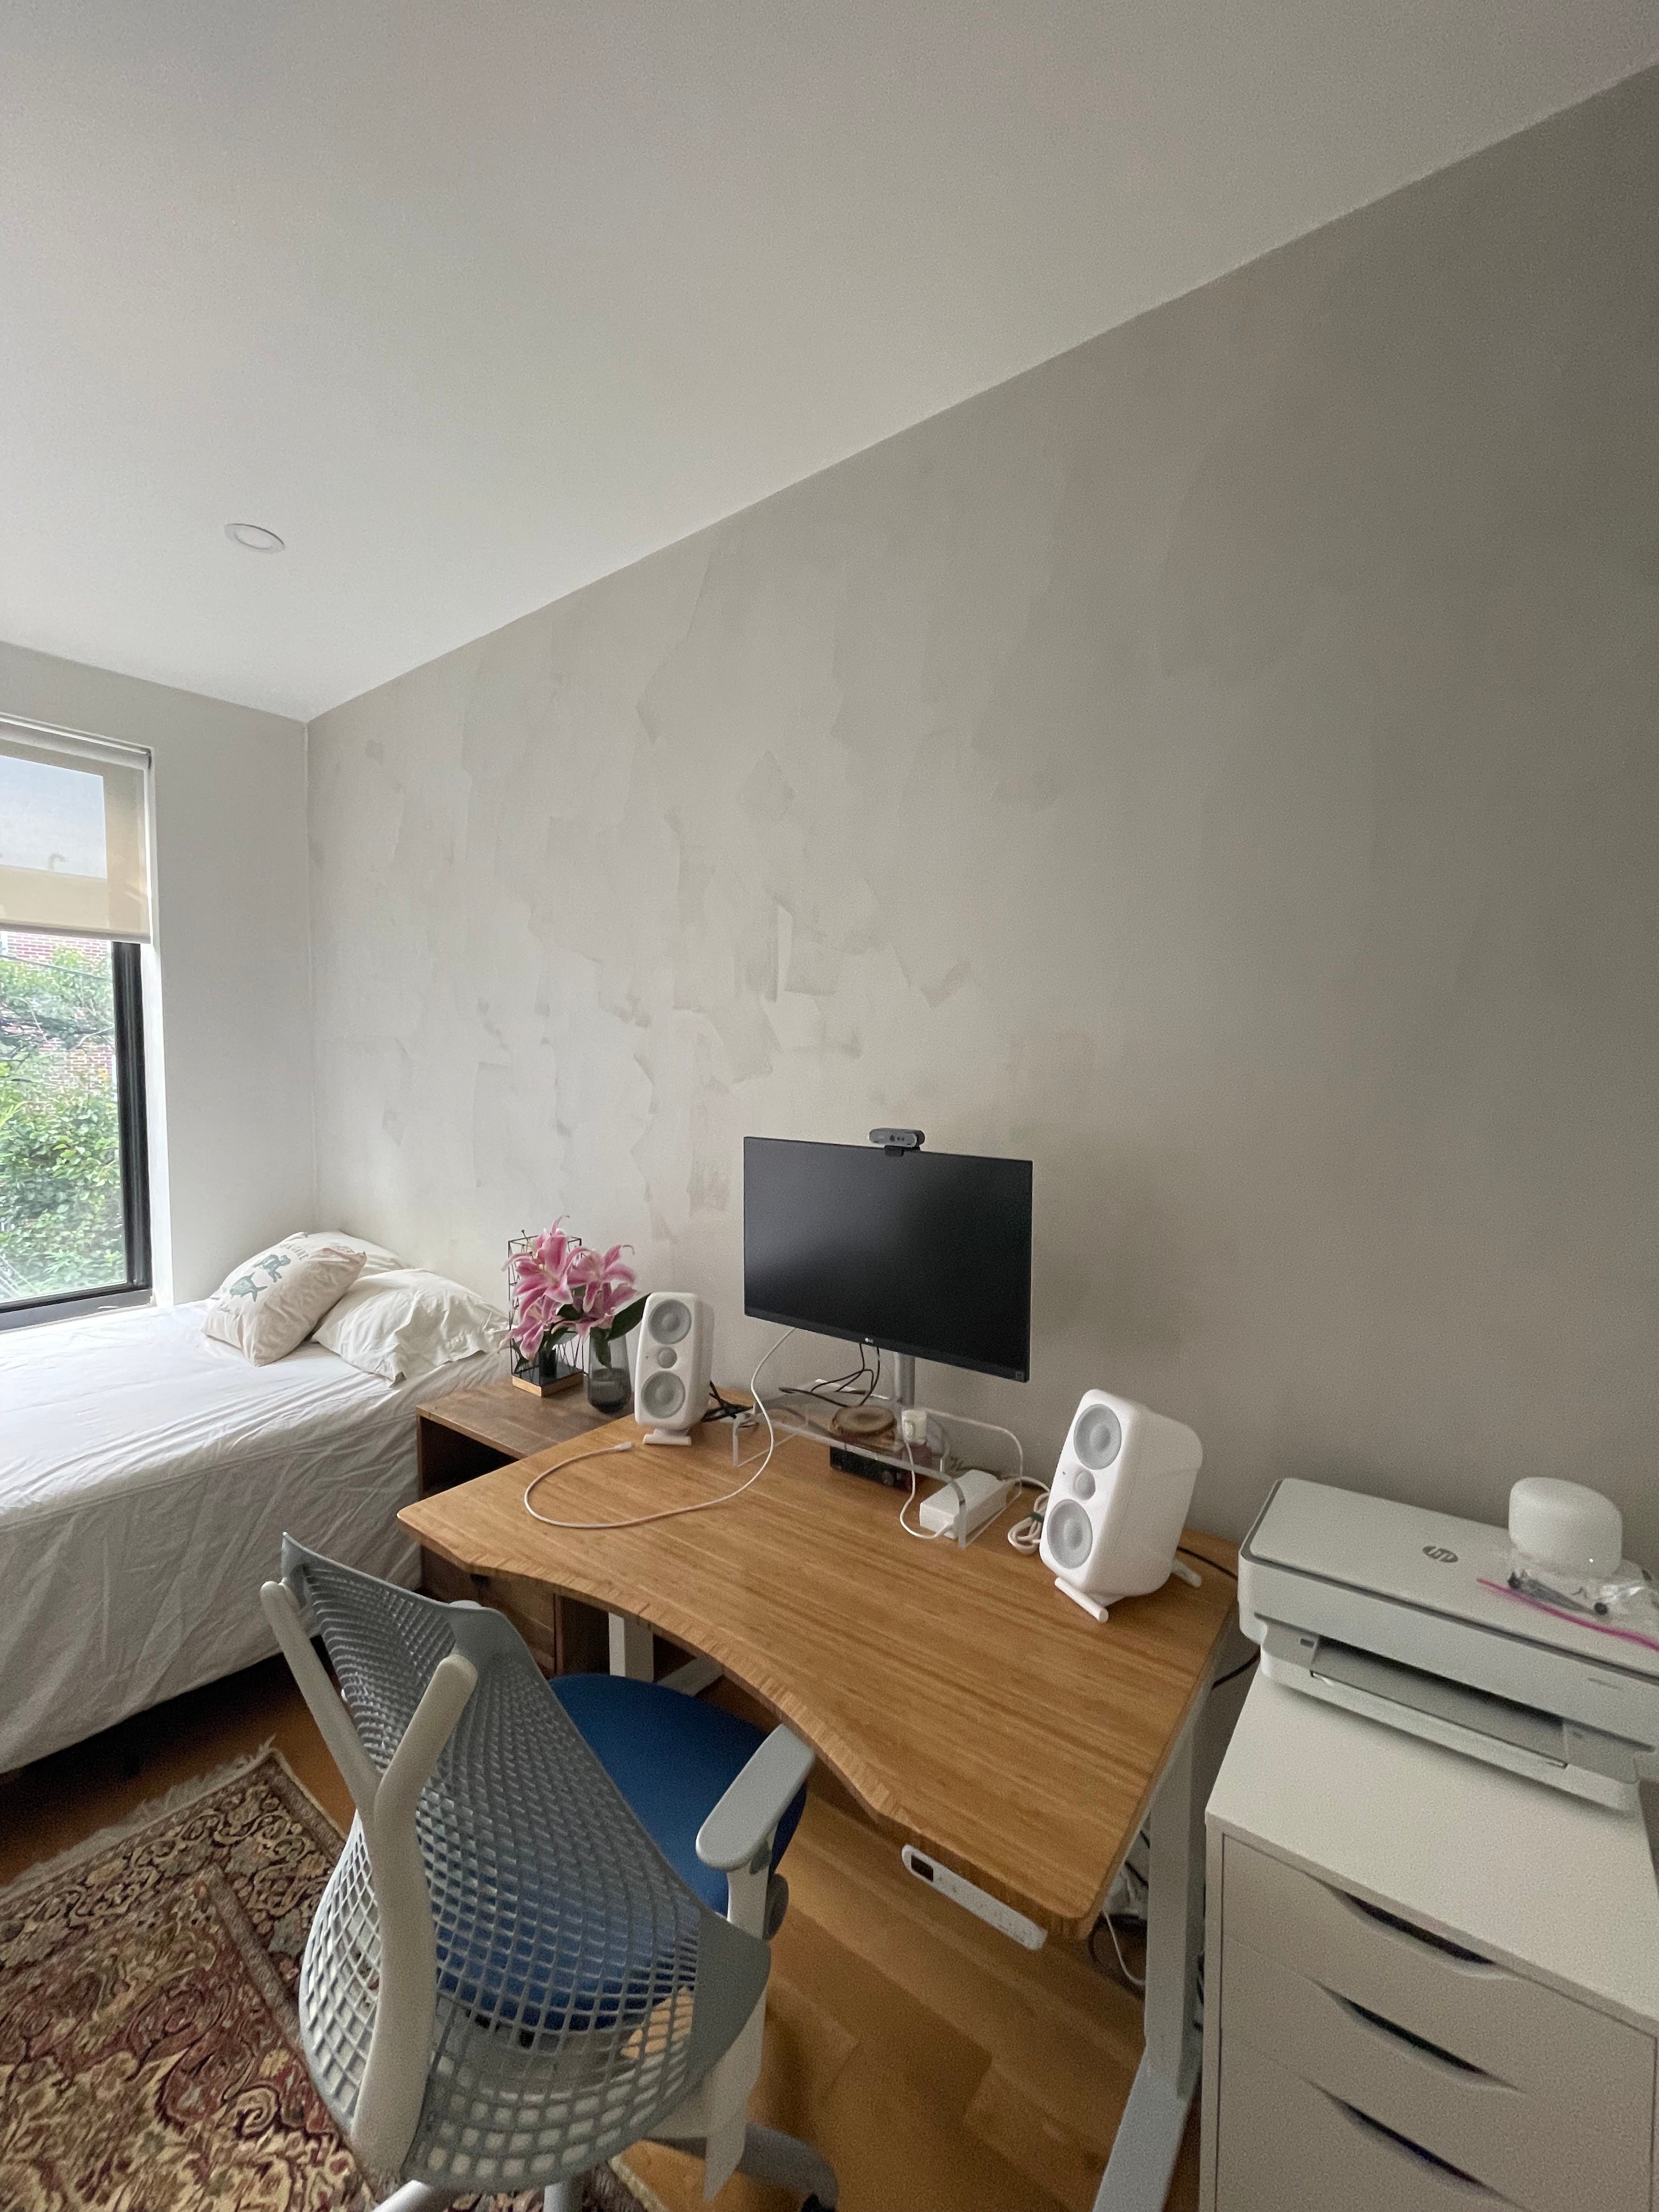
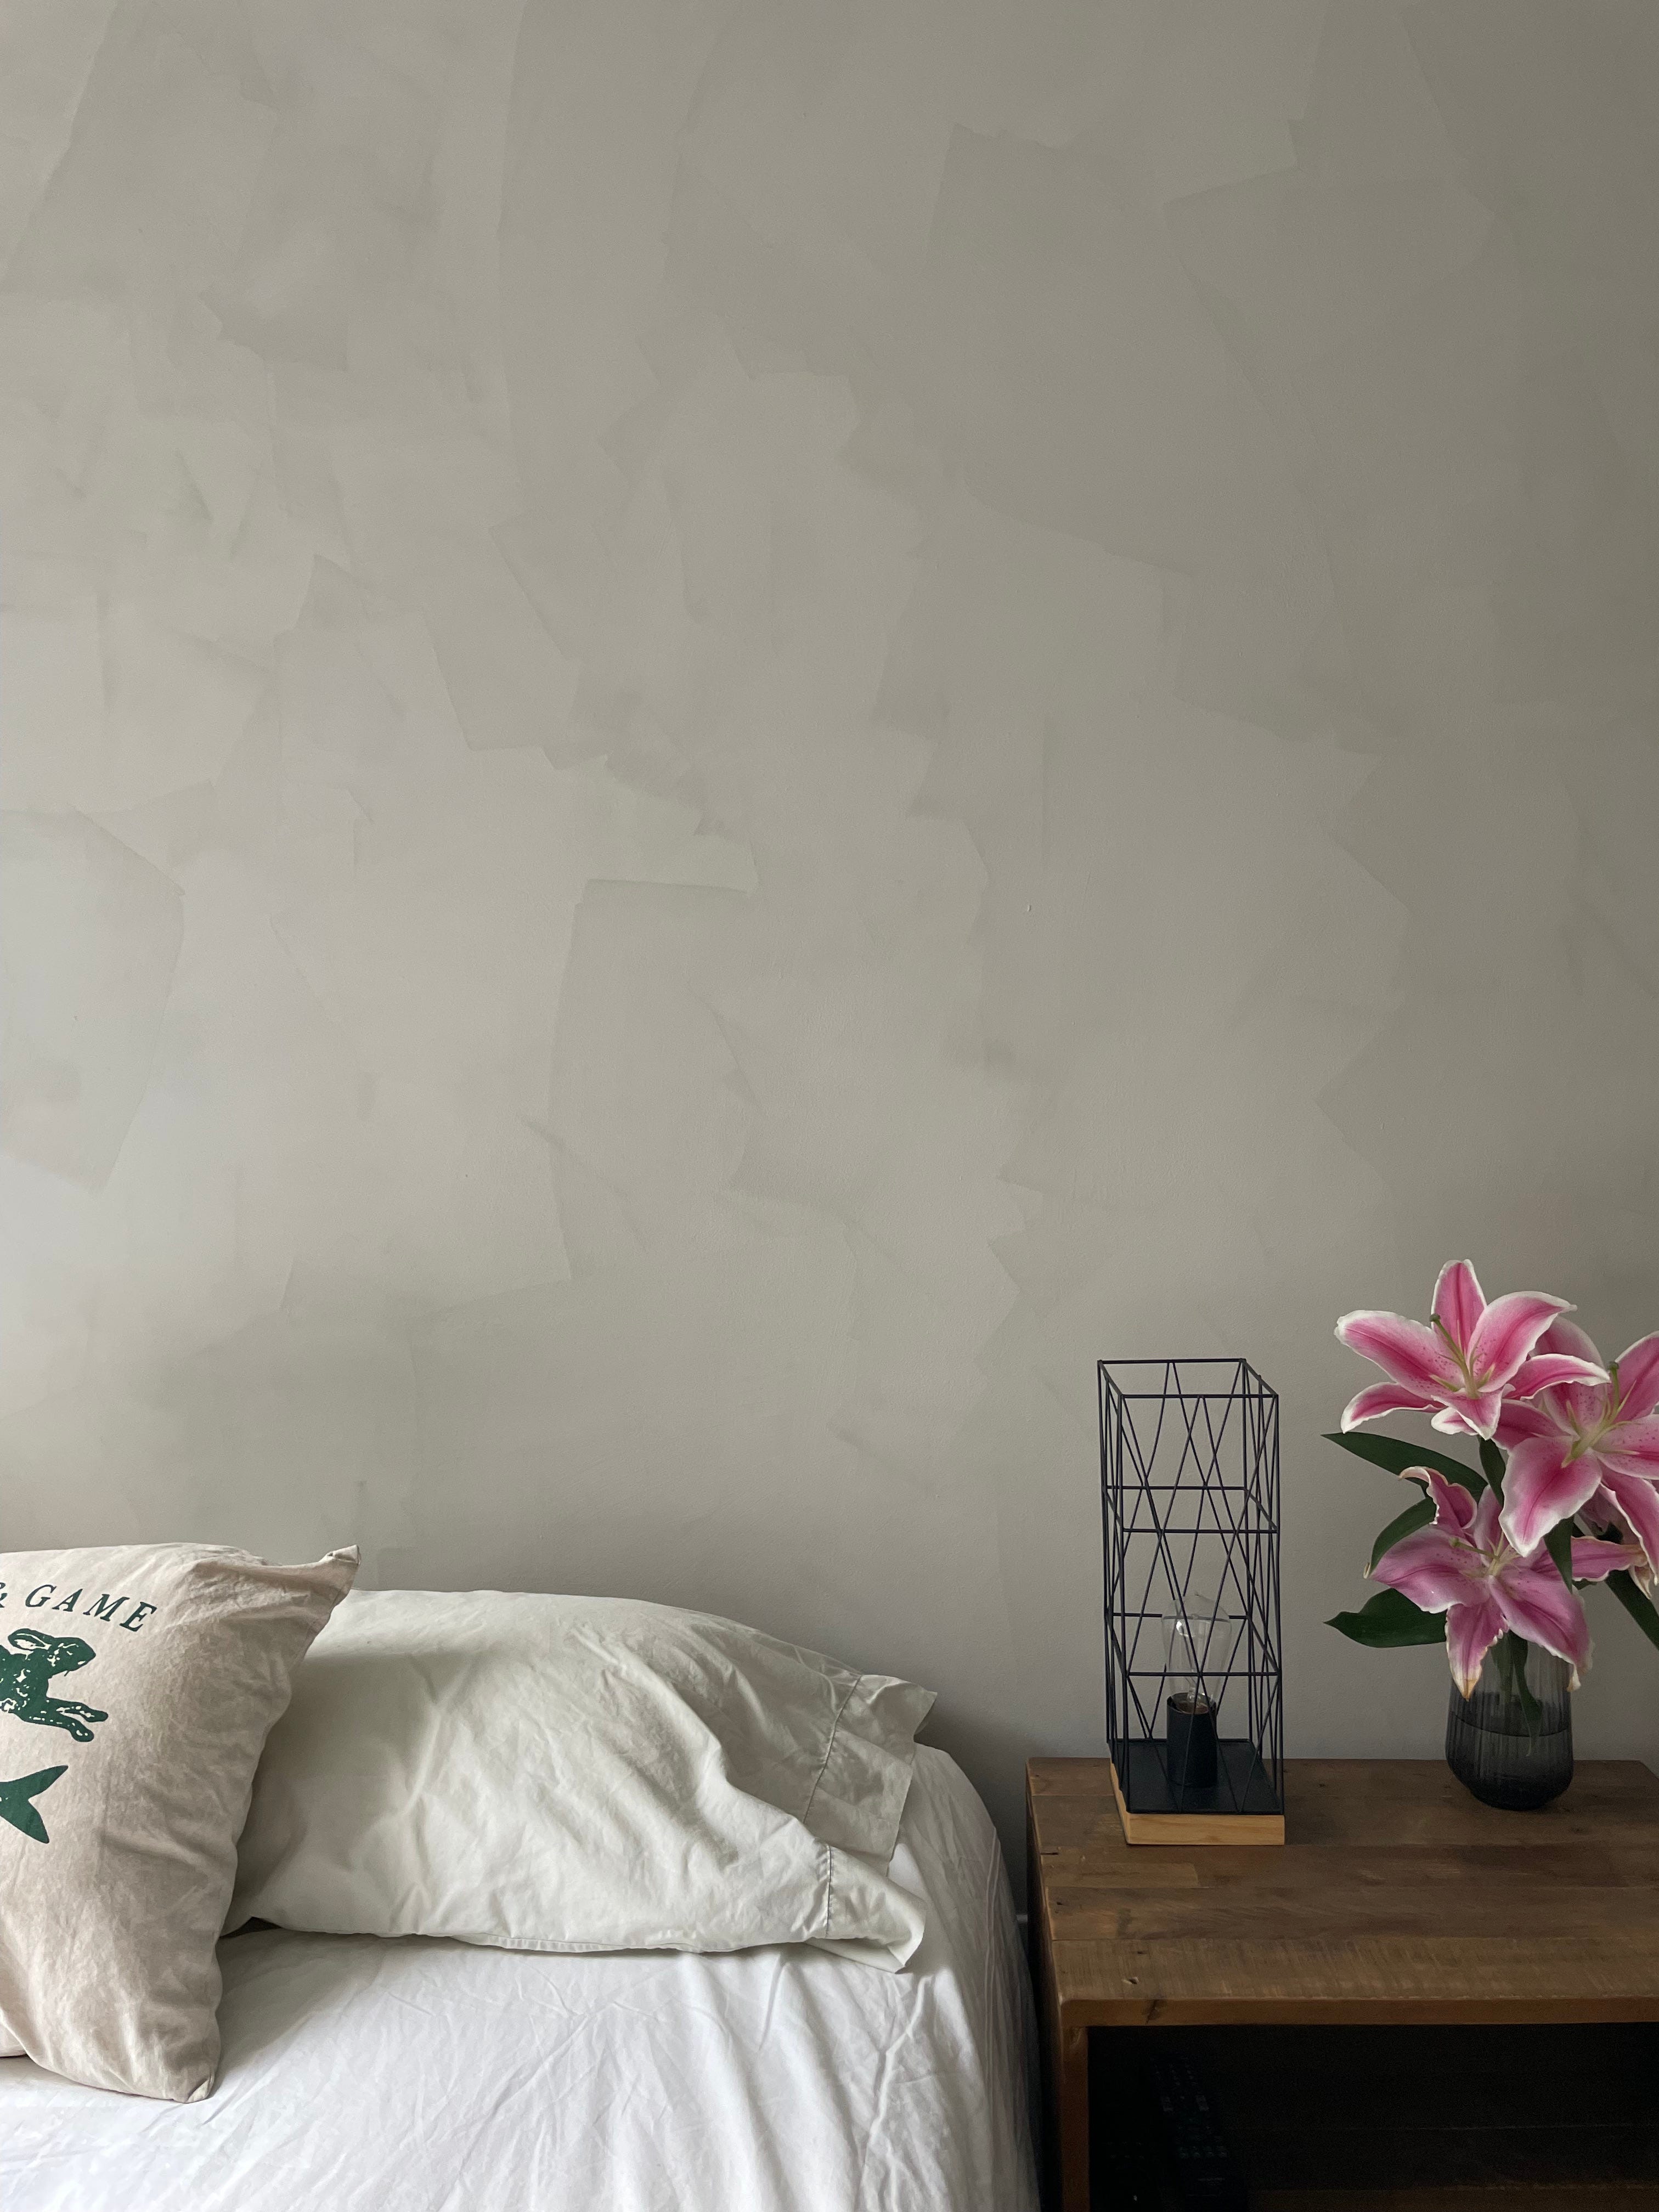
and then we were like, oh shit! This actually looks really pretty. The brush strokes appeared softer as the furniture took away some of the focus. And then Andrew’s mom reminded us that paint NEVER comes out the way it does in photos (duh, but also damn), and you learn to love it for what it is. So I immediately suppressed all the disappointment and frustration and now I’m extremely happy with it. It’s giving AD (forever my vision), and I get giddy just staring at it.

We initially planned for this to be an accent wall, but since the color turned out too light for that, we (meaning I, emotionally supported by Andrew) plan to paint the rest of the room. For now, we’re moving on to our master bedroom and starting this process all over again.
And so begins the unending journey of home improvement projects and learning curves—the agony and the ecstasy of DIY. Well done.